How to Build a Gallery Wall with Photo Frames at Home
Layouts, hanging measurements, finish mixing and Indian-home placement: a practical guide to arranging photo frames into a gallery wall that looks designed, not cluttered.
A gallery wall is the most forgiving way to put a lot of memories on one wall and still have it look designed. The trick is not taste, it is method: plan the layout on the floor, hang the centre at eye level, and keep the gaps even. Do those three things and almost any set of photos will hang together. Here is how to arrange photo frames into a gallery wall that suits an Indian home, finish by finish and room by room.
Why photo frames, and not loose prints
Loose prints and washi tape work in a hostel room. For a living room or a staircase that guests see, framed photos carry more weight, literally and visually. A frame gives each photo an edge and a margin, which is what separates a gallery wall from a noticeboard. Our photo frames are your own photo printed and set inside a wooden frame, delivered as one finished piece with the hanging hook already fitted, so building the wall is about placement, not assembly. If you are weighing frames against frameless canvas for the same wall, our canvas vs framed vs acrylic comparison lays out where each one wins.
How to arrange photo frames on a wall: four layouts that work
Pick the layout before you pick the photos. Four cover almost every wall:
- The grid: identical frame sizes in even rows and columns. The most formal, the most calming, and the easiest to get right. Perfect for a set of portraits or one trip told in nine equal frames.
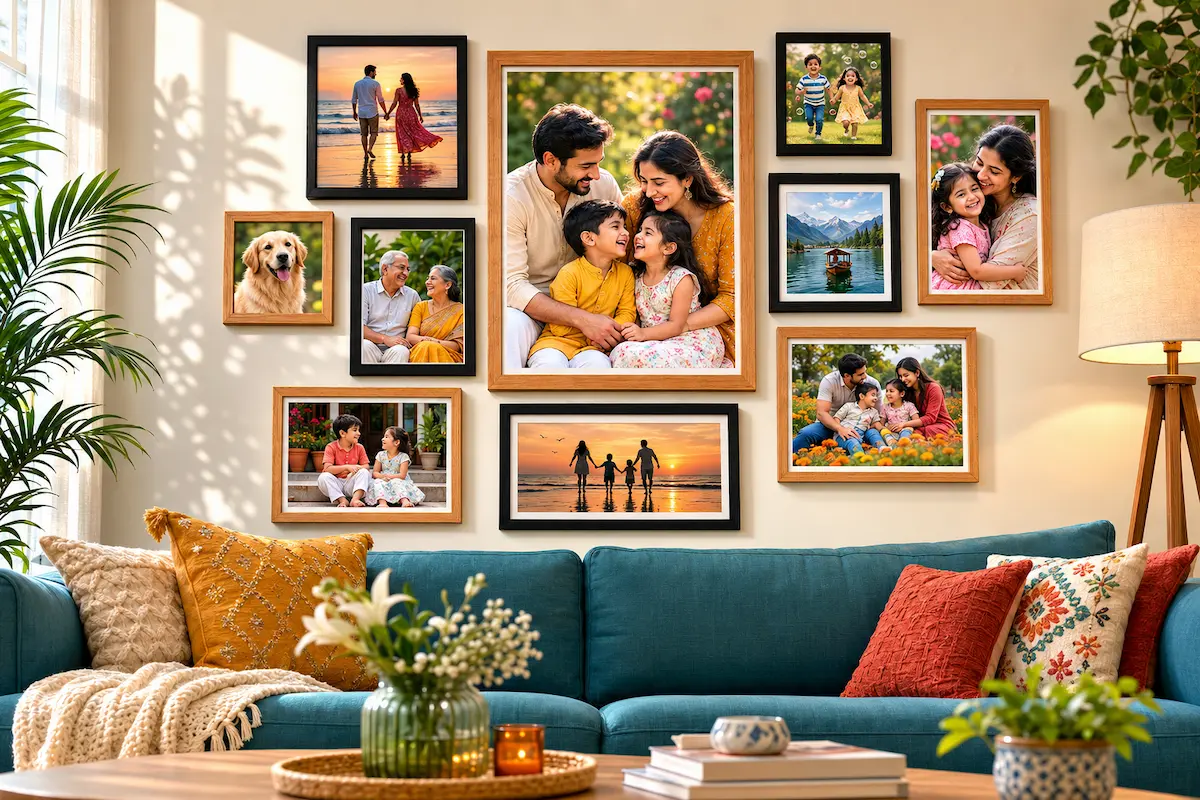
- The salon (organic) wall: mixed sizes clustered around a central anchor frame, gaps kept even. This is the classic "collected over years" look. Harder to balance, but the most personal.
- The horizontal line: frames of varying sizes aligned along a common centre line, like a timeline. Ideal above a sofa, a console, or running along a corridor.
- The staircase climb: frames stepped to follow the diagonal of the stairs, each one's centre tracking the slope. The one layout made for the most wasted wall in an Indian home.
How to hang photo frames on a wall: the measurements
This is where most gallery walls go wrong, and where a few numbers fix everything. Galleries hang art so the centre of the arrangement sits at average eye level, following the gallery standard of 57 inches on centre. Work in this order:
- Step 1, lay it out on the floor. Arrange the whole set on the floor below the wall until the spacing feels right. Move frames here, not on the wall.
- Step 2, find the centre height. The midpoint of the entire arrangement should land about 57 to 60 inches from the floor. Treat the group as one big rectangle and centre that rectangle on eye level.
- Step 3, set the gaps. Keep a steady 2 to 3 inch gap between every frame. Even spacing is what the eye reads as "designed"; uneven spacing reads as accidental.
- Step 4, template before you drill. Cut paper rectangles the size of each frame, tape them to the wall, and live with them for a day. Adjust the paper, not the plaster.
- Step 5, hang from the centre out. Place the anchor frame first, then build outward so any spacing error pushes to the edges where it shows least.
Choosing finishes and sizes
Our photo frames come in four finishes: Natural Oak for a warm everyday look, Walnut for a classic premium feel, Gallery White for clean and minimal, and Matte Black for bold modern contrast. Two ways to use them:
- Match one finish across every frame for a formal, intentional, ordered wall. Gallery White or Matte Black suit a modern flat; Walnut suits a traditional living room.
- Mix two or three finishes when you want the warm, gathered-over-time look. The wall still feels cohesive as long as one other thing repeats: the same mat margin, or all photos in black-and-white.
For sizes, vary them on purpose. A gallery wall of identical frames wants a grid; an organic wall wants a clear size hierarchy with one large anchor and progressively smaller frames around it. Our frames run from 8x8 inches up to 54x54, with portrait, landscape, square and panoramic shapes and custom sizes in between, so the anchor and its satellites can all come from one order.
Wall photo frame ideas, room by room
- Living room above the sofa: a horizontal line or a salon cluster, centred on the sofa's midline and kept within the width of the sofa below it.
- Staircase: the climb layout, frames stepping with the stairs. Family photos across generations work beautifully here.
- Entryway or passage: a tight grid of square frames, the first thing guests see, the easiest layout to keep crisp.
- Bedroom: a smaller, softer cluster of couple and family photos, often in Natural Oak or Gallery White for a calmer feel.
- Kids' room: a low, playful grid hung a little below adult eye level so the child can actually see it.
Which photos to choose
A family photo wall fails when every frame is a posed studio shot. Mix registers: one or two formal portraits as anchors, then candid moments, a travel frame, a black-and-white from decades ago. The contrast between posed and candid is what makes a family photo frame wall feel alive rather than staged. Whatever you choose, the frame can only show the detail the file holds, so check your photos against our photo resolution guide first. We accept HEIC, JPG and PNG, so iPhone photos upload without conversion, and a person checks every photo before it is printed.
Start your gallery wall
Plan the layout, order the frames in one go, and hang from the centre out. Create your photo frames from ₹1,022, each printed with your photo and ready to hang, with free shipping over ₹199, COD, and dispatch in 3 to 5 business days across India. 10,392+ customers, 4.4 stars. For more wall ideas, browse our photo frame guides.
Frequently Asked Questions
How do you arrange photo frames on a wall?
At what height should a gallery wall be hung?
Should all photo frames match or be mixed?
What gap should I leave between frames?
How many photo frames do I need for a gallery wall?
People Also Ask
How do I hang photo frames without damaging the wall?
What is the rule for hanging pictures?
Can I mix canvas prints and photo frames on the same wall?
Related articles
 Canvas Prints
Canvas Prints as Gifts: The Photo, the Size and the Timing
A canvas print gift works when three choices are right: a photo the person loves but does not own framed, a size that fits their home (16 to 24 inches is the safe gifting band), and timing that allows
Read More Canvas Prints
How to Hang Canvas Prints: Height, Walls and No-Drill Options
Hang a canvas print with its centre 57 to 60 inches from the floor, 6 to 8 inches above furniture.
Read More Canvas Prints
Rolled vs Stretched Canvas Prints: The Real Cost of Each
A rolled canvas print is the printed fabric shipped as a tube, without stretcher bars; a stretched canvas arrives mounted on its wooden frame, ready to hang.
Read More
Ready To Print Your Own Photos?
Turn your favourite memories into canvas prints, photo frames and photo collages — printed in India and delivered to your door.
Start Creating